Showing posts with label old white. Show all posts

Tuesday, May 23, 2017

Pauly D Foundation Auction Winner

Hi friends! It's been awhile since I have blogged about it, but I have been busy painting this spring. Today, I've popped in to share a reveal with you from earlier this year. This table is one of the most dramatic makeovers I've done in a while, and it was my first time working with the much raved about General Finishes Java Gel Stain.

Last fall, I donated a service to a fundraiser for our dear friends' foundation, the Pauly D Foundation. After tragically losing their son in an accidental drowning, the Pauly D Foundation was established to advocate for water safety and drowning prevention. Their vision is to make a difference by raising the bar on water safety education and awareness. I was happy to donate to such a wonderful cause. The lucky winner contacted me early in 2017, and we went right to work bringing life back to her much used dining table.


The top was in rough shape from years of use and the grandkids had given it their own special touch by carving their names in the apron with a pencil. It was definitely time to show this table some love. My client settled on a two tone look with a dark espresso top and white distressed apron. I have been intrigued by General Finishes Gel Stain for a while now. The way it works is that you can stain right over an existing finish, but this top had a lot of peeling and cracking. I decided to sand down the entire top and work with staining the raw wood for an even, clean finish.

Monday, March 21, 2016

The Making of a Farmhouse Table

This post contains affiliate links. I will receive a small commission for products purchased through these links.

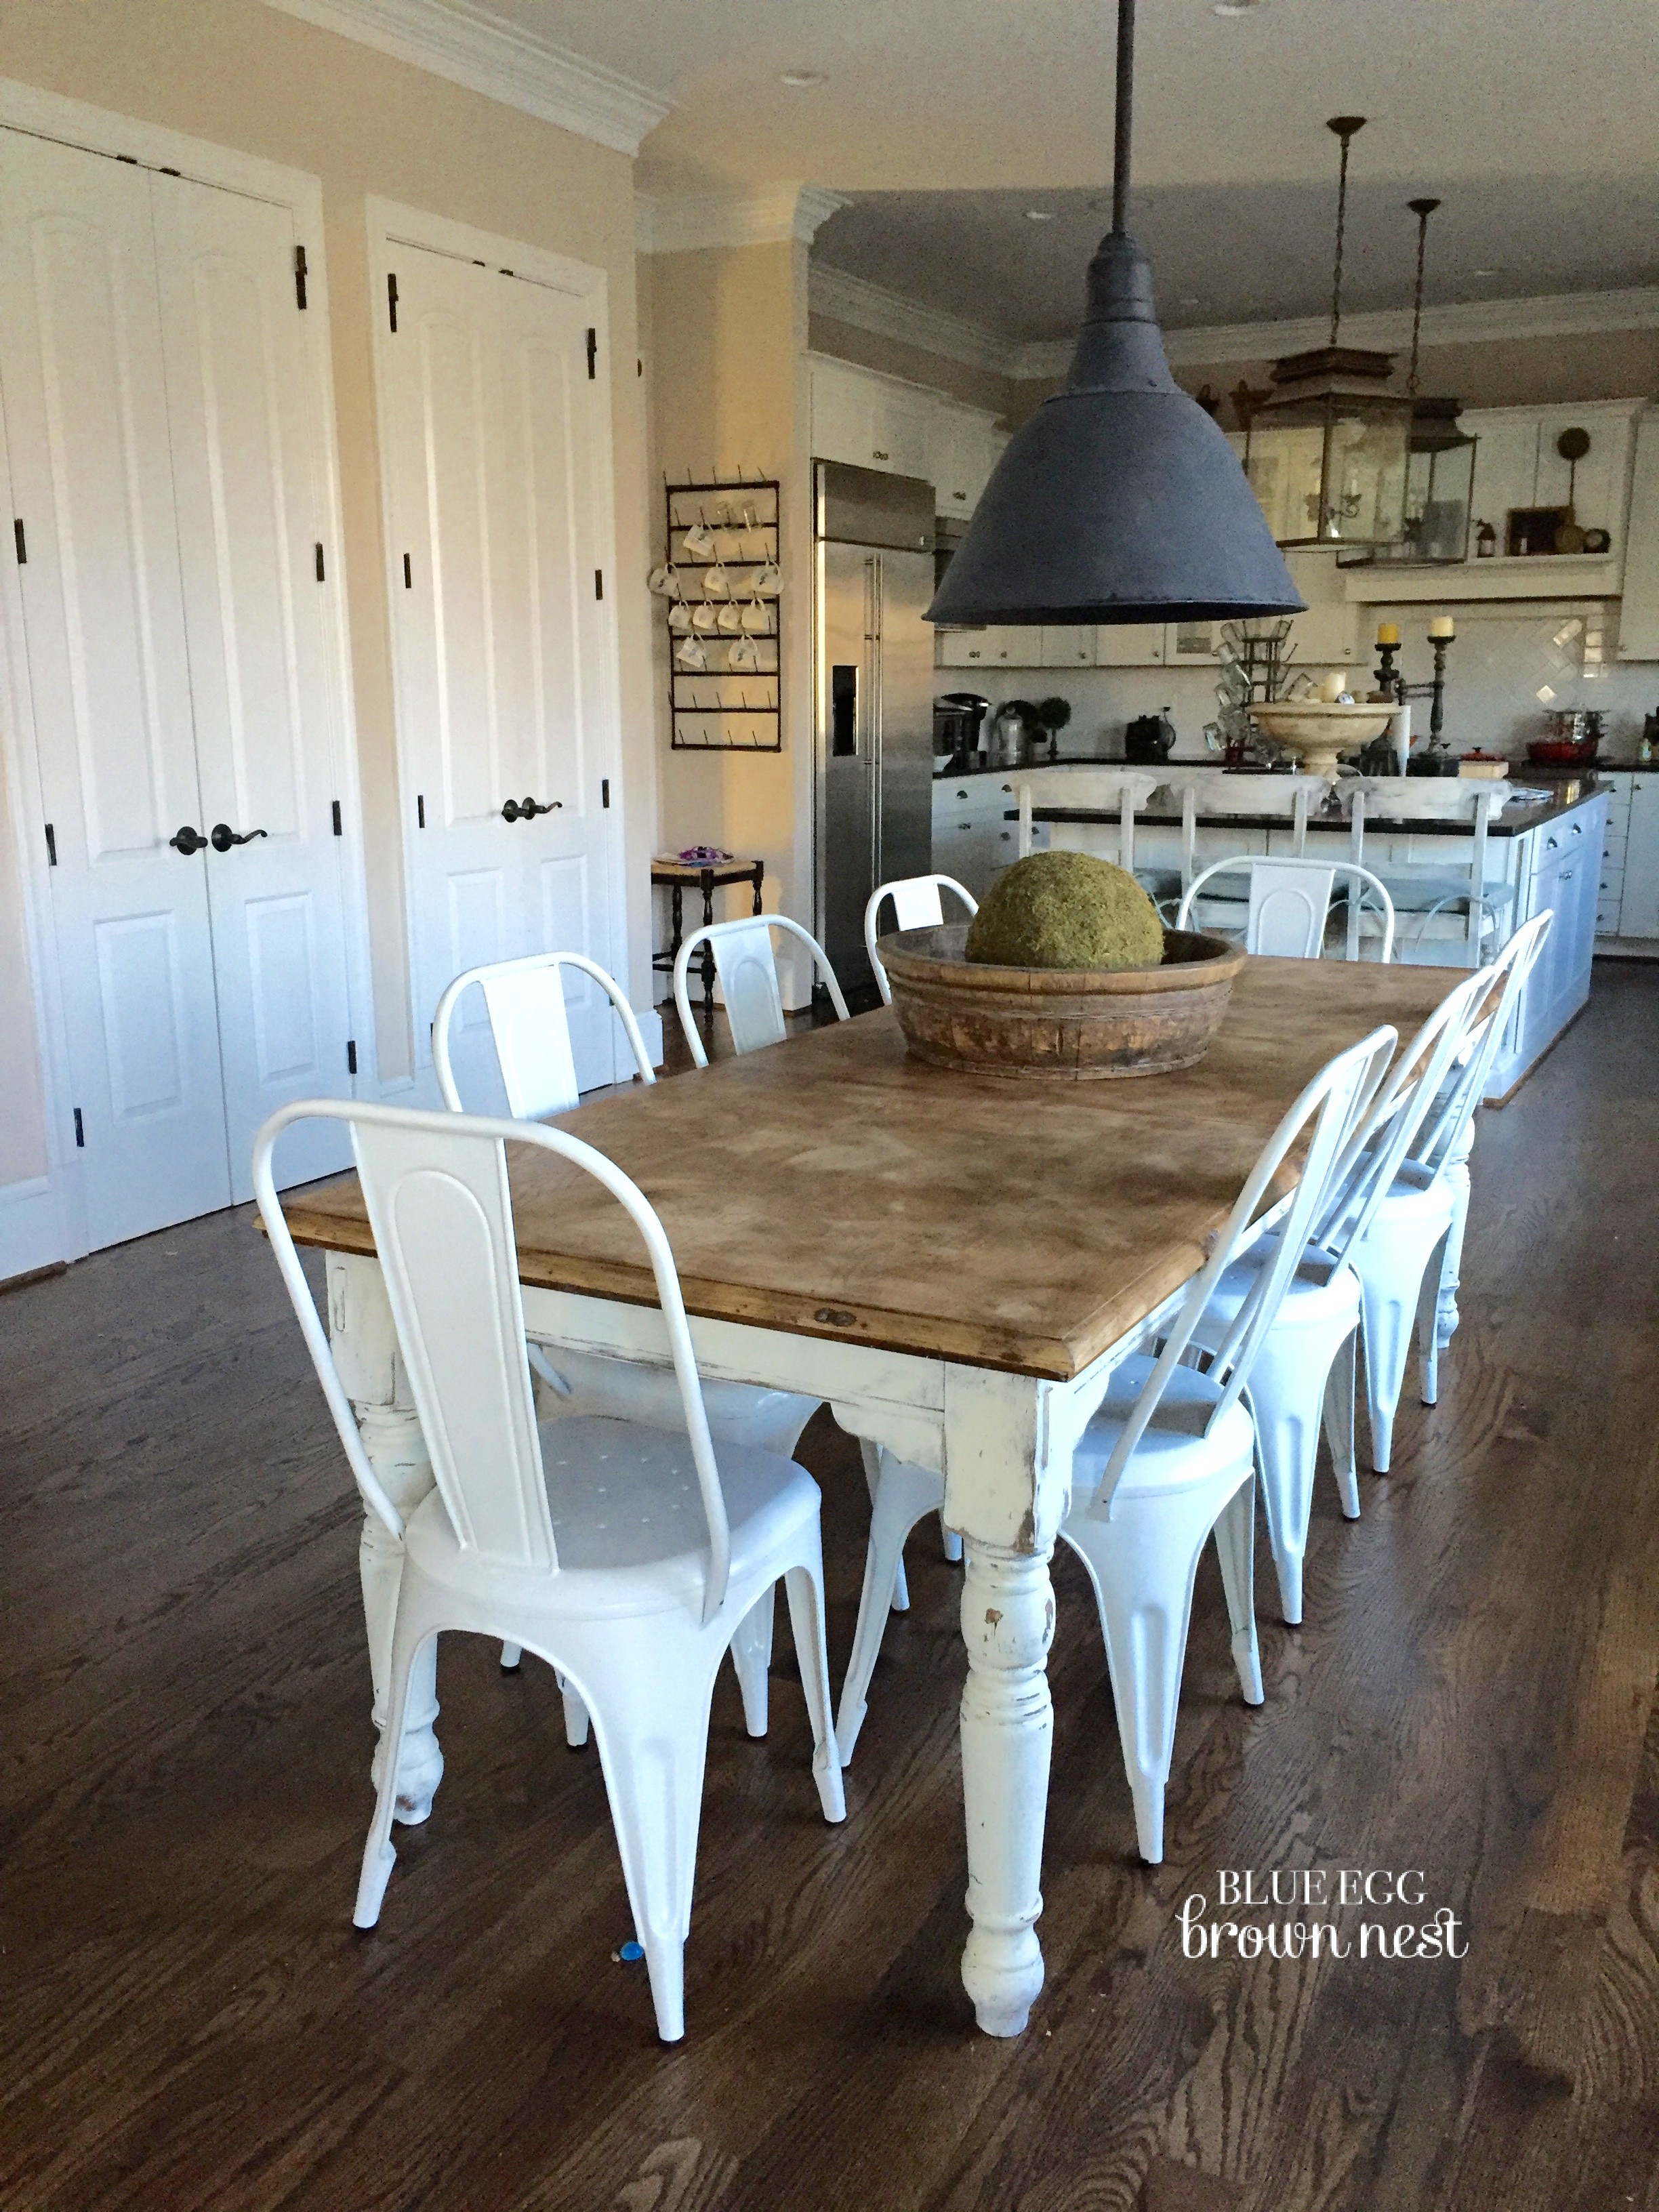
I have wanted to make over my kitchen table into a farmhouse table for a while now, but I wasn't quite sure what I wanted to do with it. Then when I was reading one of my favorite blogs, Blue Egg Brown Nest, I fell in love with her kitchen table transformation. I knew I wanted something very similar, so I set to work.
My inspiration courtesy of Christen Bensten at Blue Egg Brown Nest.

Here is what I was starting with. We bought this table from the previous owners of our home in Indiana. They were downsizing, so we were able to purchase a lot of their furniture at a great price. This table was in really good shape, but I was never a fan of the table top's finish. It was too orange for my taste, and the varnish was very dull which means it did not wipe up well. The chairs were pretty oversized and looked a little out of place in our small dining space. 

And here she is now- light and bright. I just love the worn, farmhouse look of the table with the white metal chairs. It totally fits with my white kitchen, and I love the contrast it creates with my dark stained island.
white farmhouse table

I would love to tell you how easy this project was, but I am into telling the truth on this blog and not whitewashing (pun intended) the details. I decided I wanted to try to strip off the black paint on the apron and legs of the table, stain it a weathered oak color, and then do a coat of white paint on top. I wanted natural wood coming through versus the black. This turned into a big mess that I will save for another post where I will talk about using chemical paint stripper. To be honest, I am still scarred from this process, and it is just too soon to talk about it without getting red in the face or breaking out in tears.

Monday, February 1, 2016

Goodwill Dresser Video Tutorial - Part 3 (Dark Wax)

Thanks for coming back to see the last installment of my Goodwill Dresser video tutorial series. Today, I am covering the topic that seems to give most furniture refinishers the highest anxiety- dark wax. But let me put your fears to rest, it isn't really that tricky to master.  Annie Sloan Dark Wax is amazing stuff. It gives your piece an instant antique look that would normally take about a hundred years to occur naturally.

In case you don't know anything about my Goodwill Dresser, here she is.

I created this series, so you can get this same look right in your home. I think this will always be one of my favorite pieces, and once you create your own, you might just feel the same.


Here are some links to products used in this tutorial:

Make sure you check out the other videos in this series, Part 1 and Part 2. I would love to see your creations, so send me your before and after shots if you decided to try this technique out on your own. 

Thursday, January 21, 2016

Goodwill Dresser Video Tutorial Part 2

The second part of my Goodwill dresser video tutorial is here. Last time, I covered painting the piece and hardware. Today, I will show you how to distress and clear wax the piece using sandpaper and Annie Sloan Clear Wax.


If you need a little more help on either distressing or clear waxing check out my other video tutorials. I have one for distressing and one for clear waxing.

Here are links to all the products used in this tutorial:

Originally, I thought I could break this tutorial into two parts, but I wanted to make sure they are thorough enough for the novice to average painter. Part three will come next week and will cover the most daunting part in my opinion- dark wax. But seriously, it isn't that scary. Make sure you subscribe to my YouTube channel to be one of the first to see the final video once it goes live.

Thursday, January 14, 2016

Goodwill Dresser Video Tutorial - Part 1

This link contains affiliate links. I will receive a small commission from products purchased through these links.

I am still as in love with my Goodwill Dresser as the day I painted it. Above any other piece, this is the one I get the most questions about, so I decided to divulge my secret on how I created it using Annie Sloan Chalk Paint® in Old White. Get your painting clothes on, roll up your sleeves and get ready to dive in to create your own heavily distressed beauty.

This tutorial will be broken up into three parts and will show you how to create a very heavily distressed piece just like my Goodwil Dresser. Think heavy brush strokes, lots of distressing with sandpaper and lots of dark wax. 

In part one, I show you how to prep and paint the piece and hardware. Make sure you check out the description on YouTube for links to the products I used in this tutorial.


Part two is in the works and should be up on the blog next week. Check back to learn how to distress and clear wax your piece, or you can subscribe to my YouTube channel and you will be able to view part two as soon as it goes live. Happy painting!

Thursday, March 5, 2015

Walmart Kitchen Table Makeover


walmart kitchen table

I am so pregnant, but I managed to sneak in one more client job before we welcome this baby to the fold. Today, we will be looking at a makeover I did for a client who just bought her first home. She is looking to make it her own without breaking the bank and wanted to start with this table and benches she got from Walmart.com. I know some of you might be skeptical about buying furniture from Walmart, but this set is really well made and all wood at an affordable price. Honestly, it is a great set as is, but she wanted to give it a little more character, so we decided to lighten and distress it up. The result is a cozy, little farmhouse table.
chalk paint kitchen table farmhouse

Monday, November 10, 2014

Another Goodwill Makeover...Drexel Heritage Shelf

Goodwill is one of my favorite spots to find furniture rescues. Their furniture is usually pretty reasonably priced, and they even help you load it in your car. I try to hit up Goodwill every other week even if I am not looking for something specific. Frequent trips give you the best chance of finding that diamond in the rough.

I found this shelf while my daughter and I were waiting on our van to get its scheduled maintenance at our local Toyota dealer. I paid $15 for it, and from what I researched my best guess is that this is a Drexel-Heritage piece from the 1950s or 1960s which is around the time Drexel purchased Heritage, since it only has a Heritage stamp.  The company changed its name to Drexel-Heritage in 1968. I haven't been able to pinpoint its exact value, but I know it is well over $15.

two color distressed finish

Thursday, July 24, 2014

Starting Small is Smart and Just as Fun

When you think about getting into painting furniture it is probably because you need a big change. You think your bedroom set would be perfect if you could lightened it up with some white paint. Or maybe you think, grandma's dining set you inherited because no one else would take it could really look great with a few coats of paint as well. While I agree with you whole heartedly, projects like these are a huge undertaking.

I have preached on here that starting small is always best. Get your feet wet and see if you like painting before you commit to painting a whole bedroom set or the like. I even tackle small pieces now and then to practice new techniques.

A client of mine gave me this little jewelry box to refinish for her daughter's room. It was the perfect opportunity for me to practice the modern finish I just learned from my class at Carter's Cottage. The best part of working with a piece this small is that if you mess up, it is super easy to just start all over again.


Thursday, July 3, 2014

A Look Back at My First Piece

It is hard to believe at this time last year I was living in a completely different house in another state. This past year has brought a lot of change including, a new home, a new school for my son, a new church, new friends, renewed relationships, and everything else that goes along with uprooting your family. Even though it has been tough at times, I thank God for this opportunity and the ways He has blessed our family that I couldn't have even dreamed up including this little blog, Pretty Distressed.

Last November, I decided to buy my first can of Chalk Paint® decorative paint by Annie Sloan, and my life has never been the same. I started creating all over my home and sharing it with others as I found my passion for writing again. Then, I ventured out to selling pieces and even taking on clients. I can't thank you all enough for bringing this dream to life. I am so encouraged and inspired by your comments and messages I receive daily. 

Last week, I was contacted by Annie Sloan Unfolded, the sole distributor for Chalk Paint® in the US, Canada, Australia and New Zealand. They like my work so much, they are offering me an opportunity to do a product review post right here on Pretty Distressed. It was honestly one of the most exciting emails I have ever gotten. I have been brainstorming like crazy and hope to be giving you more details as my project and post take shape.

Today, I wanted to share with you the first piece I ever refinished. It isn't anything special, but I dressed her all up to show you that dreams can start small. 


Monday, June 16, 2014

Using a Polycrylic Sealer with Chalk Paint®

This post contains affiliate links and I will be compensated if you make a purchase after clicking on my links.

Update: I recently filmed a video comparing wax and General Finishes High Performance Top Coat that is comparable to Polycrylic. Check it out. 

I have another client reveal to share with you today. This is the second job I have completed for her, and again she brought me a gorgeous family heirloom. She grew up eating at this table. Now, she gets to gather around it with her own little ones and make some new memories.
painted kitchen table

Like I mentioned, this table has already lived a long life. So, the top was pretty beat up, and its finish was peeling in spots. Normally, I don't sand before painting, but I wanted the paint to go on smoothly since I was using white and it is a table top. I got my orbital sander out and used a medium sandpaper, 80 grit, to smooth it out.

The client selected Annie Sloan Chalk Paint® in Old White which I know you see a lot of on my site, but it truly goes with anything. It has so much more depth than your average pure white, and also really helps dark wood shine through when you are distressing.

Thursday, May 29, 2014

Grandma's Tables Upcycled

painted ethan allen furniture

These beautiful end tables were dropped off to me by a client several weeks ago. They belonged to her late grandmother who she spoke very fondly of and remembered her always loving the way she decorated. She wanted to pay homage to her by having these tables in her home, but their current finish wasn't meshing well with the rest of her decor. 

Thursday, May 1, 2014

The Making of a Makeover

In my last post, I revealed my recent sideboard upcycle. There were simply too many details to share with you in one post, so today, I am going to give you the nitty gritty on this makeover. 

This piece arrived via a client and is something that I typically wouldn't gravitate toward refinishing on my own. The client didn't really have a vision of how she wanted it to look and gave me free reign to let my creative juices flow.

Monday, April 28, 2014

Sideboard w/ Leaves - Before & After

After a brief painting hiatus, I am back. I just completed another piece for a client this weekend. And I must confess, I was very scared when this piece was dropped off at my house. It was blonde oak, brass and in really rough shape. I don't know why I have such an aversion to brass, but it really makes me shudder.

Monday, March 31, 2014

At Last, the Dining Hutch Reveal Has Come Along

Happy Monday! The dining hutch reveal is finally here. For those who have been following the blog for a while, you know that I have been working on this piece for quite some time now. I inherited a dining set in early February, and as they say, the best things come to those who wait.


annie sloan chalk paint

Monday, March 24, 2014

Work in Progress...Still

The hutch I am refinishing has become my life. And, yes, it is still a work in progress. My little J-man turned four this week so I have been busy planning an epic birthday party and day for him. I hope to jump back into the swing of things and knock this piece out this week.

As you may have seen in my last hutch postI decided to go with a first coat of Paris Grey. After doing some research on washing, I decided to go with an Old White wash on top. Here is a little sneak peek. 


Thursday, March 20, 2014

Don't Lose It, Reuse It - Mirror Refinish

I believe whole heartedly these days that you shouldn't donate or throw out any decor until you try to reimagine it. This iron mirror is a prime example of this. It was one of my favorite pieces in our black and white kitchen in Minnesota, but now that we have a main level with cool grays and whites, it just seemed too dark.

Not just for wood, Annie Sloan Chalk Paint can be used on metal, glass or even outside on pots and garden decorations. This was a really quick transformation that my mom helped me with. She was watching me paint and had to get her hands on some Annie Sloan.


annie sloan chalk paint

Thursday, March 13, 2014

Eleanor's Table - Before & After

I am super excited for this post today. Recently, I mentioned that I inherited my husband's grandmother's dining set, and today is the day for the reveal of Eleanor's table!

chalk paint

Monday, March 3, 2014

Cane You Dig It - Dining Set Sneak Peek

I know I promised you my last post on the kitchen today, but I thought I would take a break from all the kitchen fanfare and give you a sneak peek at my latest painting project.

I am currently in the process of refinishing my husband's grandma's dining table, chairs and hutch. This set just fell into my lap after a cousin needed to downsize. I have been working on this for a couple of weeks now. I am no where near being done, but I did manage to finish one of the chairs this weekend.


Thursday, January 23, 2014

Repair Cracked and Chipped Furniture Like a Pro


I hope most of you saw my Goodwill dresser reveal recently. In that post, I talked about how two of the corners of the piece were damaged. It turns out, it wasn't that difficult to fix them. All I needed was some expert advice and a how-to video from home improvement guru, Ron Hazelton.

I followed his video step by step. Check out how it went.

My Goodwill find

Crack #1

Crack #2


I had to purchase some materials, but I am glad I will have them for the future in case I run into another piece that needs some TLC. 

Items I had:
clamps
putty knife
wood glue
WD-40
scrap plywood
utility knife
sandpaper

Items purchased:
dowels

My Home Depot didn't have the Minwax brand of wood filler. I ended up finding it at my local Ace Hardware store. I highly recommend getting this specific brand because it worked great and allows for filing just 30 minutes after application. I also suggest getting a 4 in 1 wood rasp/file to save yourself some money. It has four different file textures on it to shape your corner in stages. Start with the coarsest side and work your way down.  


Here is a shot of getting the wood filler on. You have to work fast with this stuff because it hardens really quickly. You don't want to over work it, and clean your putty knife right away with acetone. I didn't do this the second time and ended up throwing it away because there was no getting the wood filler off once it dried. 

Also, I had nice clamps because my hubby is planning on building me a farm table for my dining room. If you don't have clamps, get some like Ron uses in his video. They are only $.99 at Home Depot.


I apologize for the blurry pictures. My lighting was really bad that day.


Here is corner #1 after cutting it out with my utility knife and filing it down with my 4 in 1 rasp. I finished it off with some 150 then 220 grit sand paper.


Here is corner #2. I had a big chunk of this drawer that I was able to glue back on with wood glue before I added the wood filler.

Completed corner #1

Completed corner #2

The finished piece

Again, thank you to Ron Hazelton, for his easy to follow tutorial. I will never be intimidated by chipped furniture again. What about you? Do you feel more comfortable tackling furniture repair now?


09 10