Showing posts with label clear wax. Show all posts

Saturday, January 20, 2018

Paris Grey Hutch Makeover

This post contains affiliate links. I will receive a small commission for products purchases through these links.

It's been a while since I shared a client piece on here, but I had to share the latest client piece I finished. This thing is massive and was in such rough shape when I got it. I just love the way it turned out!


This hutch had been in a storage unit for some time and smelled pretty funky, so I started off by sealing the entire piece in Zinsser Shellac. This product along with neutralizing smells helps seal water stains and bleed through. It is always a great idea to coat a piece in Shellac if you don't know its history. I took an old sock and applied it over the entire piece before painting.

Tuesday, May 23, 2017

Pauly D Foundation Auction Winner

Hi friends! It's been awhile since I have blogged about it, but I have been busy painting this spring. Today, I've popped in to share a reveal with you from earlier this year. This table is one of the most dramatic makeovers I've done in a while, and it was my first time working with the much raved about General Finishes Java Gel Stain.

Last fall, I donated a service to a fundraiser for our dear friends' foundation, the Pauly D Foundation. After tragically losing their son in an accidental drowning, the Pauly D Foundation was established to advocate for water safety and drowning prevention. Their vision is to make a difference by raising the bar on water safety education and awareness. I was happy to donate to such a wonderful cause. The lucky winner contacted me early in 2017, and we went right to work bringing life back to her much used dining table.


The top was in rough shape from years of use and the grandkids had given it their own special touch by carving their names in the apron with a pencil. It was definitely time to show this table some love. My client settled on a two tone look with a dark espresso top and white distressed apron. I have been intrigued by General Finishes Gel Stain for a while now. The way it works is that you can stain right over an existing finish, but this top had a lot of peeling and cracking. I decided to sand down the entire top and work with staining the raw wood for an even, clean finish.

Thursday, February 2, 2017

My New Obsession: Annie Sloan® Graphite

I have a new color obsession to share with you- Annie Sloan®'s Graphite. Any fans of PrettyDistressed™ know I love me some Old White, Paris Grey, French Linen and an occasional Duck Egg Blue in her Chalk Paint™ line. In the past, I have shied away from using Graphite. It is the darkest color in the Annie Sloan Chalk Paint® pallet, and I had heard it can be tricky to work with. But let me tell you now that I have used it, I am dying to paint something in my house with this color. It's so rich and unique. Then once you put the wax on, it comes to life!


I am so grateful for my clients, and the way they push me out of my comfort zone. She selected Graphite for this dresser I was refinishing for her son's room. She has an amazing old century home and has a lot of antique brass throughout the home, so we knew we wanted to do a brass cup pull on the dresser. I selected the Martha Stewart Bedford Brass Canopy Cup Pull from HomeDepot.com. Graphite is really the ultimate complement to the antique brass. The cool thing about it is it's not a true black but more of a slate like a chalkboard.

Thursday, January 21, 2016

Goodwill Dresser Video Tutorial Part 2

The second part of my Goodwill dresser video tutorial is here. Last time, I covered painting the piece and hardware. Today, I will show you how to distress and clear wax the piece using sandpaper and Annie Sloan Clear Wax.


If you need a little more help on either distressing or clear waxing check out my other video tutorials. I have one for distressing and one for clear waxing.

Here are links to all the products used in this tutorial:

Originally, I thought I could break this tutorial into two parts, but I wanted to make sure they are thorough enough for the novice to average painter. Part three will come next week and will cover the most daunting part in my opinion- dark wax. But seriously, it isn't that scary. Make sure you subscribe to my YouTube channel to be one of the first to see the final video once it goes live.

Monday, November 10, 2014

Another Goodwill Makeover...Drexel Heritage Shelf

Goodwill is one of my favorite spots to find furniture rescues. Their furniture is usually pretty reasonably priced, and they even help you load it in your car. I try to hit up Goodwill every other week even if I am not looking for something specific. Frequent trips give you the best chance of finding that diamond in the rough.

I found this shelf while my daughter and I were waiting on our van to get its scheduled maintenance at our local Toyota dealer. I paid $15 for it, and from what I researched my best guess is that this is a Drexel-Heritage piece from the 1950s or 1960s which is around the time Drexel purchased Heritage, since it only has a Heritage stamp.  The company changed its name to Drexel-Heritage in 1968. I haven't been able to pinpoint its exact value, but I know it is well over $15.

two color distressed finish

Thursday, October 23, 2014

Duck Egg Blue Love

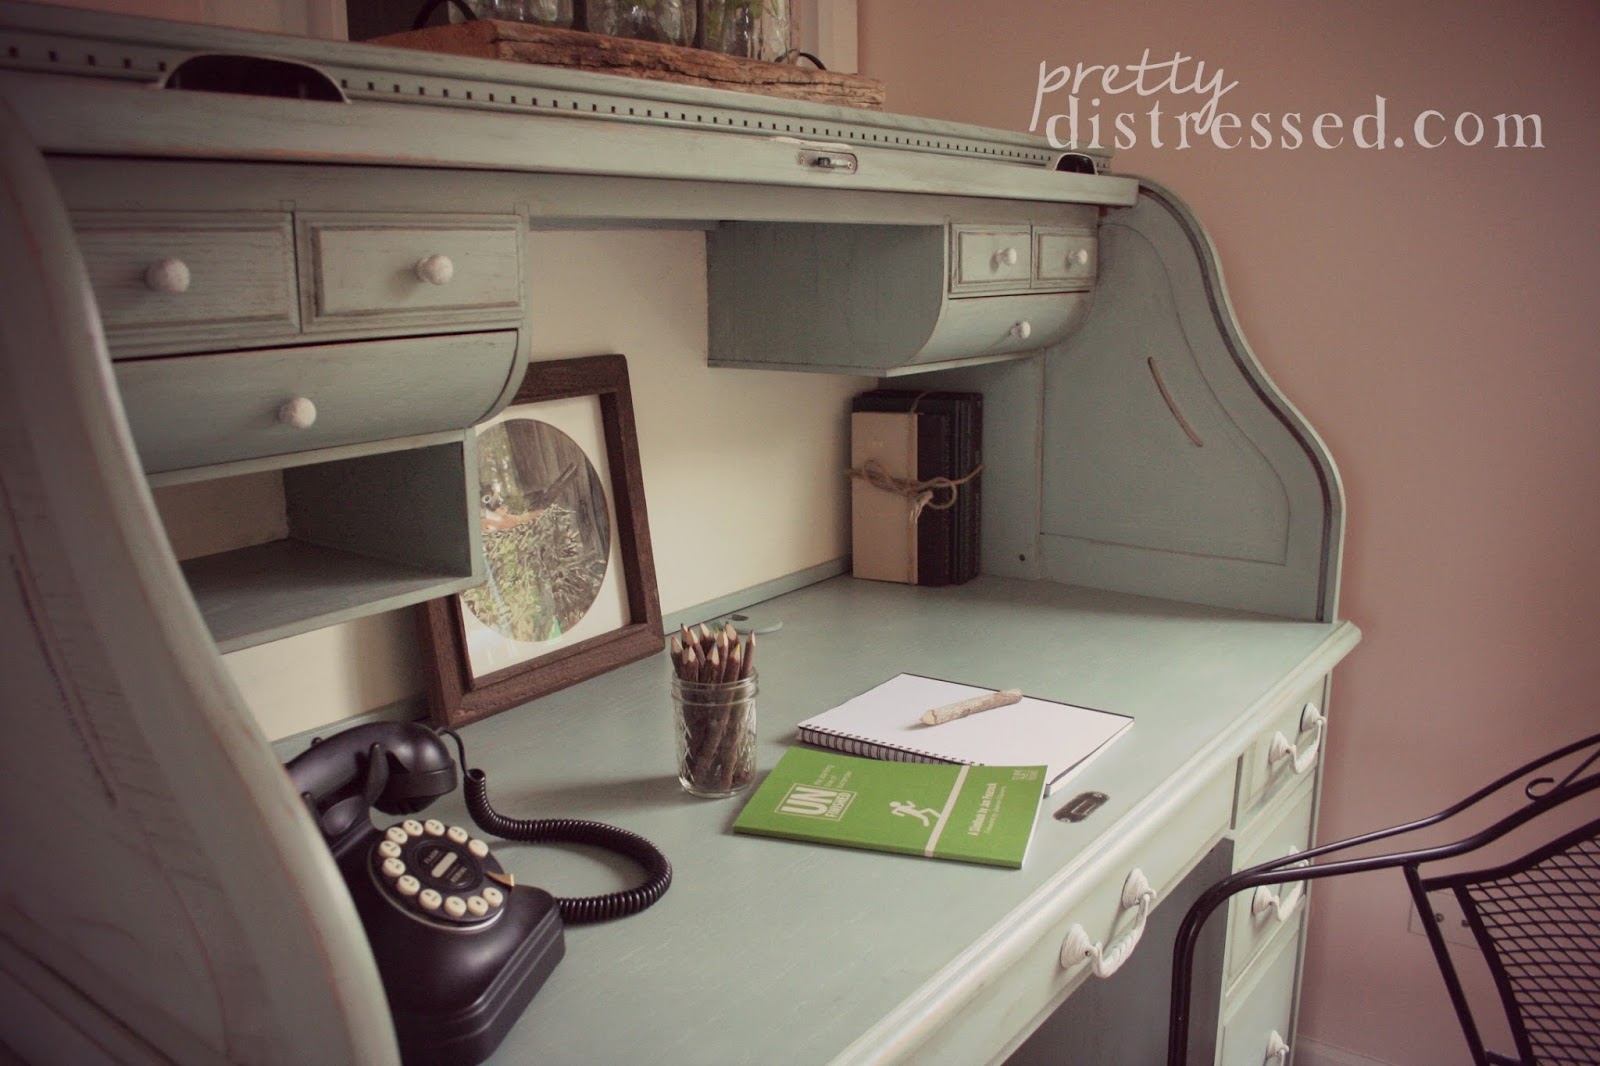
It's my favorite kind of day here at Pretty Distressed- a reveal day. I recently got to refinish this roll top desk and was totally grateful that my client let me come shoot it in her home.

duck egg blue

I have been wanting to refinish a desk for a long time, and I literally jumped for joy when she selected Duck Egg Blue (Annie Sloan Chalk Paint®) as her color. I have done accent pieces in this color all over my house, but have never been brave enough to paint an entire piece with it. I used Old White on the back of the desk to provide a little contrast and didn't wax it so it has a nice chalky look. The hardware was also painted with Old White and finished with Annie Sloan Clear Wax.

Monday, September 29, 2014

Applying Annie Sloan® Soft Wax with a Lint Free Cloth

I have been busy working on some client pieces this past week and was inspired to share another video tutorial with you. People always ask me if you need to get a wax brush to wax your furniture, and the answer is "no." In fact, I think most newbies out there will find it a little easier to apply wax for the first time with a lint free cloth versus a wax brush.


Monday, September 8, 2014

Painting Fabric with Chalk Paint® Decorative Paint by Annie Sloan

annie sloan paint fabric
By now, most of you know about my obsession with Chalk Paint® Decorative Paint by Annie Sloan. You can paint almost anything with this wonder paint, and the best part there is no sanding or stripping involved. For my latest project, I was lucky enough to partner with the folks over at Annie Sloan Unfolded to makeover an amazing antique settee with my favorite paint.

This beauty came my way when Angel from Angel Michelle Photography contacted me to breathe some new life into this piece as she was wanting to use it as a photo prop. The shape and detail of this piece was gorgeous, but the current upholstery choice- not so much. Upholstery work and fabric costs can skyrocket pretty quickly, so I decided to give painting this bad boy a try. I had read about this technique in Annie Sloan's book Color Recipes for Painted Furniture and More. I am pretty impressed with the results.

Monday, August 18, 2014

Modern Chairs to Aged Beauties

This week I finished up a set of chairs to go with my recent antique kitchen table I completed for a client. Another great thing about painting furniture is that you don't have to have a complete matching dining or kitchen set. These chairs are originally from Pier 1 Imports and had a black finish with red distressing coming through. I painted them with Annie Sloan Chalk Paint® in Coco to match the table.


Tuesday, August 5, 2014

Antique Kitchen Table

One of my favorite things about working with clients are the amazing pieces that come my way that I wouldn't get to paint on my own. Recently, I completed this gorgeous antique table for a client. She is a woman after my own heart, a Craigslist bargain hunter. She practically stole this table from its previous owner. And while the finish was beautiful and in decent shape, it did not fit in with her crisp, clean decor.


Thursday, July 24, 2014

Starting Small is Smart and Just as Fun

When you think about getting into painting furniture it is probably because you need a big change. You think your bedroom set would be perfect if you could lightened it up with some white paint. Or maybe you think, grandma's dining set you inherited because no one else would take it could really look great with a few coats of paint as well. While I agree with you whole heartedly, projects like these are a huge undertaking.

I have preached on here that starting small is always best. Get your feet wet and see if you like painting before you commit to painting a whole bedroom set or the like. I even tackle small pieces now and then to practice new techniques.

A client of mine gave me this little jewelry box to refinish for her daughter's room. It was the perfect opportunity for me to practice the modern finish I just learned from my class at Carter's Cottage. The best part of working with a piece this small is that if you mess up, it is super easy to just start all over again.


Thursday, May 29, 2014

Grandma's Tables Upcycled

painted ethan allen furniture

These beautiful end tables were dropped off to me by a client several weeks ago. They belonged to her late grandmother who she spoke very fondly of and remembered her always loving the way she decorated. She wanted to pay homage to her by having these tables in her home, but their current finish wasn't meshing well with the rest of her decor. 

Tuesday, May 27, 2014

Annie Sloan Chalk Paint® Video Tutorial #5 - Dark Wax


Today is the final installment of my Chalk Paint vlog series, and we are talking about dark wax. For those of you who haven't worked with it before, this stuff is amazing. It gives your piece a antique look in no time. If you love that lived in, shabby look, you will love dark wax.

Monday, May 19, 2014

Annie Sloan Chalk Paint® Video Tutorial #4 - Clear Wax


Here is the next installment in my Chalk Paint video tutorial series, clear wax. This is the trickiest step in my opinion. There is a learning curve with the waxing process, but I love the finish it creates. It is a lot prettier than a poly which can make your furniture look plastic coated.

Monday, March 31, 2014

At Last, the Dining Hutch Reveal Has Come Along

Happy Monday! The dining hutch reveal is finally here. For those who have been following the blog for a while, you know that I have been working on this piece for quite some time now. I inherited a dining set in early February, and as they say, the best things come to those who wait.


annie sloan chalk paint

Thursday, March 20, 2014

Don't Lose It, Reuse It - Mirror Refinish

I believe whole heartedly these days that you shouldn't donate or throw out any decor until you try to reimagine it. This iron mirror is a prime example of this. It was one of my favorite pieces in our black and white kitchen in Minnesota, but now that we have a main level with cool grays and whites, it just seemed too dark.

Not just for wood, Annie Sloan Chalk Paint can be used on metal, glass or even outside on pots and garden decorations. This was a really quick transformation that my mom helped me with. She was watching me paint and had to get her hands on some Annie Sloan.


annie sloan chalk paint

Thursday, March 13, 2014

Eleanor's Table - Before & After

I am super excited for this post today. Recently, I mentioned that I inherited my husband's grandmother's dining set, and today is the day for the reveal of Eleanor's table!

chalk paint

Thursday, February 20, 2014

My Annie Sloan Chalk Painting Kit

Here is my attempt at my first video blog. 

Observations: 
1. I say "like" and "um" a lot. 
2. I obsessively touch my face. 
3. I am not looking directly at the camera. 
4. I have the sniffles.

I will work on all these issues for my next video, but I think you will really enjoy the content if you are thinking about dabbling in furniture painting. Don't get overwhelmed with all the items. I bought mine slowly over time. Start small, see if you like painting and build from there.


Monday, January 20, 2014

Goodwill Dresser Upcycle Reveal

This post contain affiliate links. I will receive a small commission from products purchased through these links.

Update (1-20-16): You guys love this makeover so much I have created a series of video tutorials to show you exactly how I achieved this look. Check out part 1 and part 2 on my YouTube channel. Part 3, the last video in the series, coming soon!

I am beyond excited to share this reveal with you. This is my first refinishing project with a piece I bought from a secondhand store. The hunting part was challenging, but also exciting.

I found this gem at Goodwill for $24.99. I hesitated to buy it at first because it had a couple of chipped drawers. Keep checking back for a post on how I fixed that problem. This thing was really banged up, too, with tons of dents and weird spills and stains. I almost walked away but my gut told me that at this price, I had to give it a chance. And I am so glad I did. It is the perfect piece for our front foyer.
I started off by sanding down all the spills and giving it a good scrubbing with some Murphy Clean and Shine Spray. This thing was dir-ty.


This is one of the corners I repaired. You can't even tell. Post coming on this technique soon. 


I removed all the hardware and sprayed it with Rust-Oleum Universal spray paint and primer in Hammered Black. This was my first time using this product, and let me tell you, it is amazing! This stuff looks like real metal. It costs around $7 at Home Depot, and it probably saved me about $50-80 in new hardware costs.


This look was created using two coats of Annie Sloan Chalk Paint in Old White. I tried a new technique and distressed it before I used my Annie Sloan Clear Wax. I used 100 grit sand paper to distress followed by a coat of clear wax and finished it off with a mix of clear and dark wax. I wanted this really shabby because of all the nicks and dents it has, so I used dark wax on the entire piece versus just in the spots I distressed.

With the great price I got for this piece, I am tempted to try and sell. But I think at this point, I am too in love with it. What do you think? Sell or keep?

Monday, January 13, 2014

Annie Sloan Chalk Paint- I Die

I have been dreaming of using Annie Sloan Chalk Paint since I first started researching it in August. This stuff is pretty pricey (one pint runs around $38 and the clear and dark waxes go for $28), and you will also need to invest in some good brushes and other essentials. 


I finally bit the bullet and bought some in early December. In the words of my girl Rachel Zoe- I die. This stuff is truly amazing. I am having a blast reimagining things all over my house.  

There are tons of great bloggers and small business owners that have great tips and tutorials on using Chalk Paint. Some of my favorites are Blue Egg Brown Nest, Simply Reinvented, and The Purple Painted Lady. There is a bit of a learning curve on how to use the paints and waxes, but I really think there are tons of ways to achieve the look you want. I have pulled inspiration and tips from all these websites to Chalk Paint my way.

Here are some pieces I upcycled from around my house using Annie Sloan Chalk Paint.

Project #1: End table
Before

After
I painted my first coat with Paris Grey and a lighter second coat with Old White. 


I applied clear wax and heavily distressed it with a 100 grit sandpaper. 

Project #2: Nightstand


Before

After


Here I used two coats of Paris Grey followed by a coat of clear wax and heavy distressing. 

Then I finished it off with a mixture of clear and dark wax to give it that aged look.


Project #3: Floor Lamp


Before and After

I used one coat of Old White on the base of the lamp and lightly distressed it. I then did a coat of clear and dark wax. The lamp shade look was created with painter's tape and spray paint. Read more about this lamp upcycle.
What about you? Are you dying to try ASCP?

Disclaimer: At the time of this original post, this blog and this post are not sponsored by Annie Sloan Chalk Paint. I received no product or compensation for this review.

Extra: Behind the Scenes

Photo shoots don't always go as planned. My little J.S. and S.J. wanted to join in on the fun.

Putting down the phone and breaking out the big boy.
09 10